How to connect MackBook to an iMac
There are two simple method to connect your MackBook to an iMac .
Methods:
- Using your iMac as a Monitor.
- Sharing files Between Computers.
Method 1:- Using your iMac as a Monitor
STEP 1:
Determine the cable you’ll need for your iMac. The type of cable you’ll need varies by model:
- iMac 27-inch (2009): Mini DisplayPort to Mini DisplayPort cable.
- iMac 27-inch (2010): Mini DisplayPort to Mini DisplayPort cable.
- iMac (2011- early 2014): Thunderbolt cable.
- iMac models from late 2014 (the Retina 5k model) and later can’t be used as displays.
STEP 2:
Locate the port on your MacBook. If both the MacBook and iMac have the same port (Mini DisplayPort or Thunderbolt), you won’t need to purchase an additional adapter. If your MacBook has a Thunderbolt 3 (USB-C) port, you’ll need a Thunderbolt 3 (USB-C) to Thunderbolt 2 adapter.
STEP 3:
Turn on both computers. If you haven’t yet logged in to either computer, you should do so now.
STEP 4:
Connect the Mini DisplayPort or Thunderbolt cable to both computers.
STEP 5:
Press ? Command+2 on the iMac. The iMac’s display will now show the MacBook’s screen instead of its own.
Method 2: Sharing files Between Computers.
STEP 1:
Connect both Macs to the same wireless network. If you don’t have a wireless network, you can use an Ethernet cable instead (just connect the cable to an Ethernet port on both computers, and then move to the next step).
STEP 2:
Click the menu on the computer that has something to share. It’s at the top-left corner of the screen.
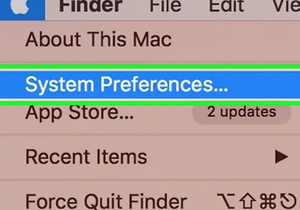
STEP 3:
Click System Preferences.
STEP 4:
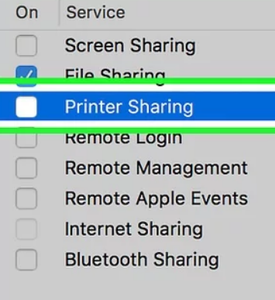
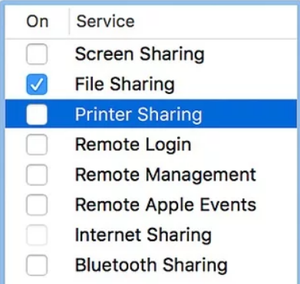
Click Sharing. A list of sharing services will appear.
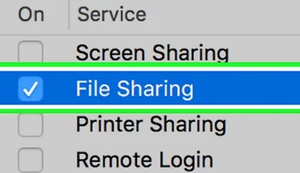
STEP 5:
Set up file sharing. Here’s how to allow users of the other computer to access the files on this one:
- Click File Sharing.
- Click + under the folder list.
- Select a folder and click Add.
Anyone with account on this Mac can access it from the other computer. If you want to restrict access to certain users, select the folder, click + under the user list, then select who should have access.
You can add users with local accounts (regular logins you set up on this Mac) or by Apple ID by selecting them from your contacts.
STEP 6:
Open Finder on the other computer. It’ll be the first icon on the Dock, which is usually at the bottom of the screen.
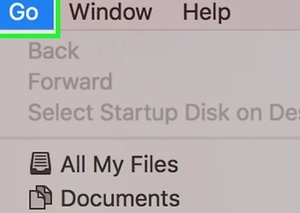
STEP 7:
Click the Go menu. It’s at the top of the screen.
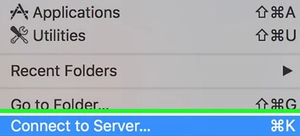
STEP 8:
Click Connect to Server.
STEP 9:
Enter the IP address for the other computer. This is the address you found on the other computer’s Sharing screen.
STEP 10:
Click Connect.
STEP 11:
Choose how to connect.
- Select Registered User if you want to log into a local account on the other computer.
- Select Apple ID to log in that way.
- Select Guest if the files don’t require a login.
STEP 12:
Follow the on-screen instructions to log in. Once you’ve connected to the other computer, you can access its files.
STEP 13:
Set up printer sharing (optional). If you’d like to share the printer from this computer, return to the Sharing settings, click Printer Sharing, and choose a printer. Once shared, you’ll be able to print to it from any app on the other computer by selecting the printer (and logging in, if prompted to do so).
- Anyone with an account on this computer can print by default. To select specific users, click + under the user list, then choose who should be allowed to print.
STEP 14:
Set up other types of sharing (optional). If you want users of the other computer to be able to connect to this one for remote administration or screen sharing, choose one of those options from the list, then follow the same instructions as you did for file and printer sharing.


Comments
Post a Comment